

Trame and Jupyter Lab
A trame application, while working in standalone fashion, can also be imported inside Jupyter and displayed within a notebook.
To make that possible, the user will need to be able to import and instantiate such application in a Jupyter context. Then, the user will need to have access to the layout (ui) of that application so it can be displayed in the notebook flow.
Simple example
If you want to give it a try, you can setup a virtual environment like below:
# Create virtual-environment
python3 -m venv .venv

# Activate environment
source .venv/bin/activate  # => Linux / Mac
# .\.venv\Scripts\activate # => Window

# Install dependencies
pip install trame trame-vtk trame-vuetify # adding vuetify + vtk.js for demo app
pip install jupyterlab
Then you can start Jupyter Lab and run the follow cells
# start Jupyter
jupyter lab
Then within a new notebook, you can import our trame cone demo example (We'll look into the code later).
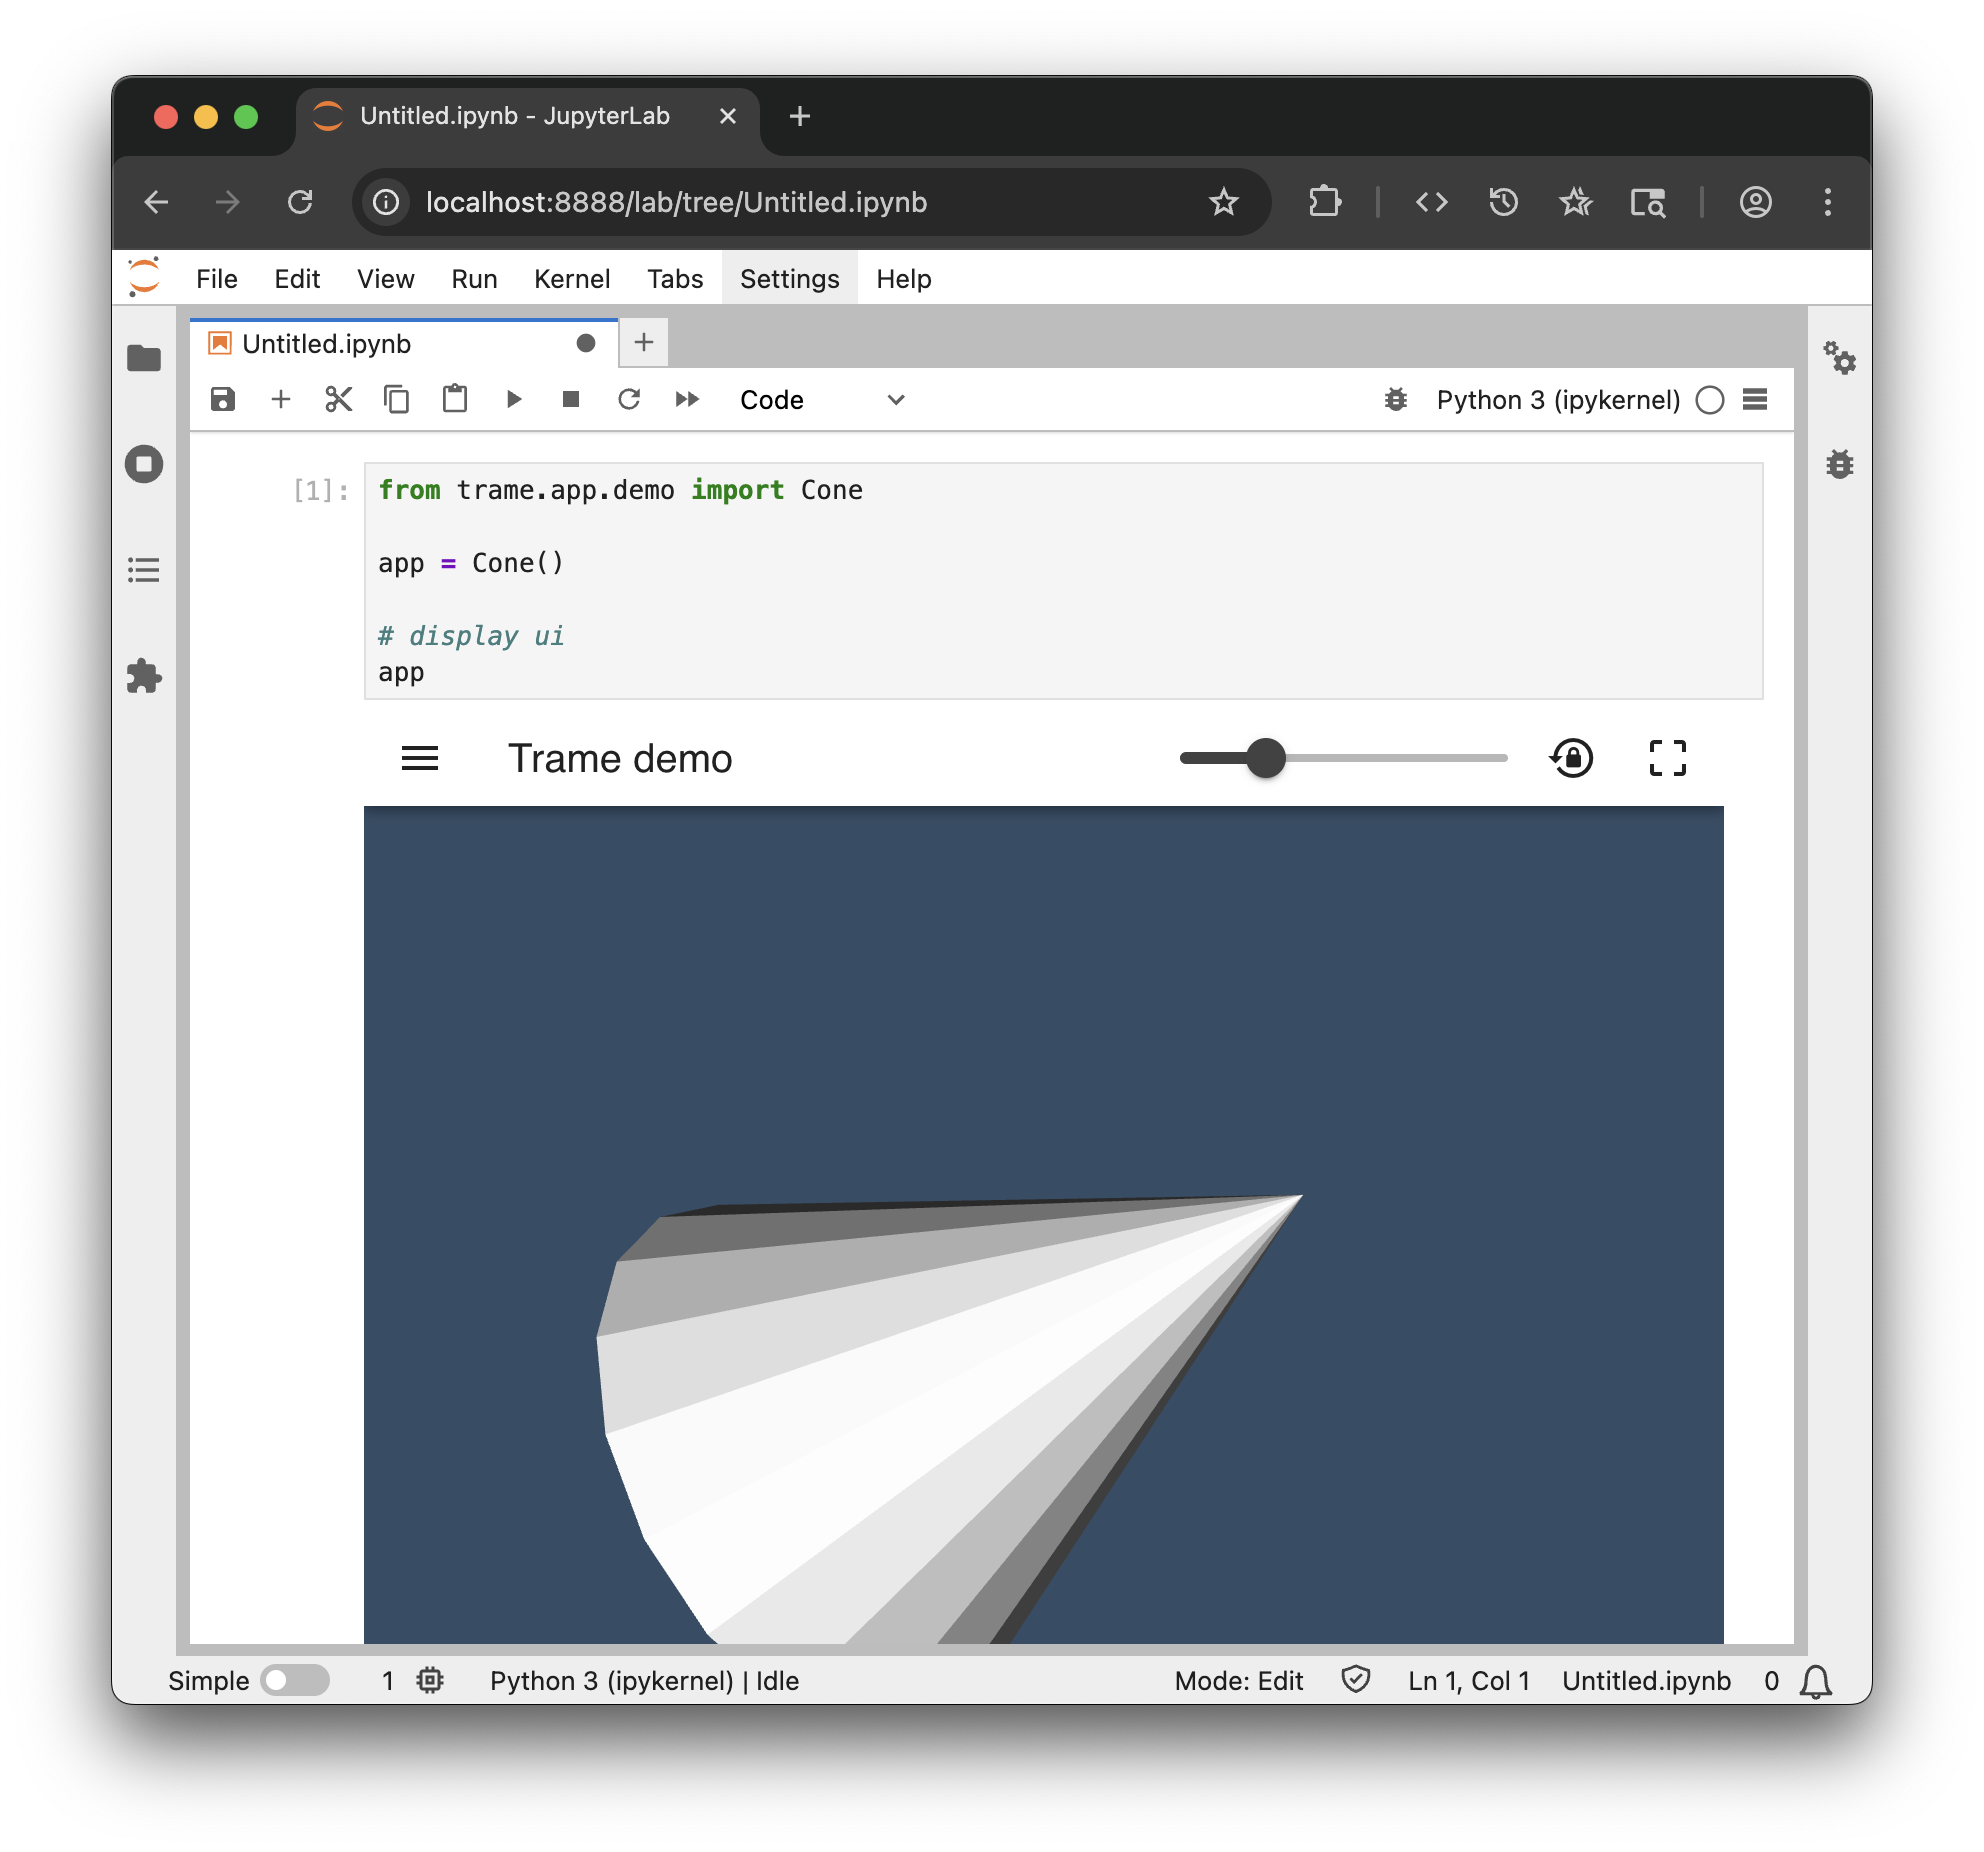
from trame.app.demo import Cone

# Create new application instance
app = Cone()

# Put the UI into the resulting cell
await app.display_cell(height="600px")
Alternatively, the application instance can be returned and used directly to display the cell in JupyterLab.
However this syntax will not work when used in google-colab's context where an explicit call to `display_cell` is
expected.# Alternative syntax to instantiate and display the app in JupyterLab cell
Cone()
# The previous call is equivalent to instantiating the application, followed by a direct `repr` call
app = Cone()
app # This line will trigger the display of the app in the cell
# However, for cross-compatibility with google-colab it's preferable to use the display_cell method
app = Cone()
await app.display_cell()This should look like
If you want more examples using the same code, you can look at that binder example repository.
google-colab
Starting with trame-client v3.13.1 trame is compatible with google-colab's Jupyter environment.
To run trame in google-colab, start by installing trame's dependencies.
%%capture --no-stderr

!pip install -q --upgrade trame trame-vtk trame-vuetify
The application can then be displayed using the display_cell method.
from trame.app.demo import Cone

# Create new application instance
app = Cone()

# Put the UI into the resulting cell
await app.display_cell(height="600px")