

ParaView
ParaView is the world’s leading open source post-processing visualization engine. It integrates with your existing tools and workflows, allowing you to build visualizations to analyze data quickly. With its open, flexible, and intuitive user interface, you can analyze extremely large datasets interactively in 3D or programmatically using ParaView’s batch processing.
Download ParaView
ParaView 6+ can be downloaded from here.
Virtual Environment
ParaView comes with its own Python, which may be missing some dependencies for the desired usage. We can add more Python packages into ParaView by creating a virtual environment and then activating it.
First, we need to setup the ParaView add-on python environment, in which we will only install trame, but we could add any other Python libraries that are not included in the ParaView bundle.
python3.12 -m venv .pvenv
source ./.pvenv/bin/activate
python -m pip install --upgrade pip
pip install trame trame-vtk trame-vuetify
deactivate
Note:
- We can not use our virtual environment with a
vtkas ourvtklibrary will conflict with the one inside Paraview. - Since ParaView includes
vtk, any VTK example can be run with ParaView assuming the proper code is used to handle the virtual-env loading to get trame inside our Python script. - The python you use for creating your virtual-environment must match the Python version that comes with ParaView. (So far 6.0 and 6.1 use Python 3.12)
Conda environment
Conda provide many open-source packages and ParaView is part of their offering. When using the conda approach you won't need to download ParaView as it will get installed by conda for you. That way you can create a virtual-environment that can contain both ParaView and trame by doing the following.
conda create -n pv-env -c conda-forge paraview trame trame-vtk trame-vuetify
conda activate pv-env
Then later you can simply use python rather than pvpython
conda activate pv-env
python .../trame-app.py
Running an example
The command line below illustrate how a SimpleCone example can be run on a Mac computer where ParaView 5.10 has been installed.
/Applications/ParaView-6.1.0.app/Contents/bin/pvpython \
    --venv .pvenv \
    ./05_paraview/SimpleCone.py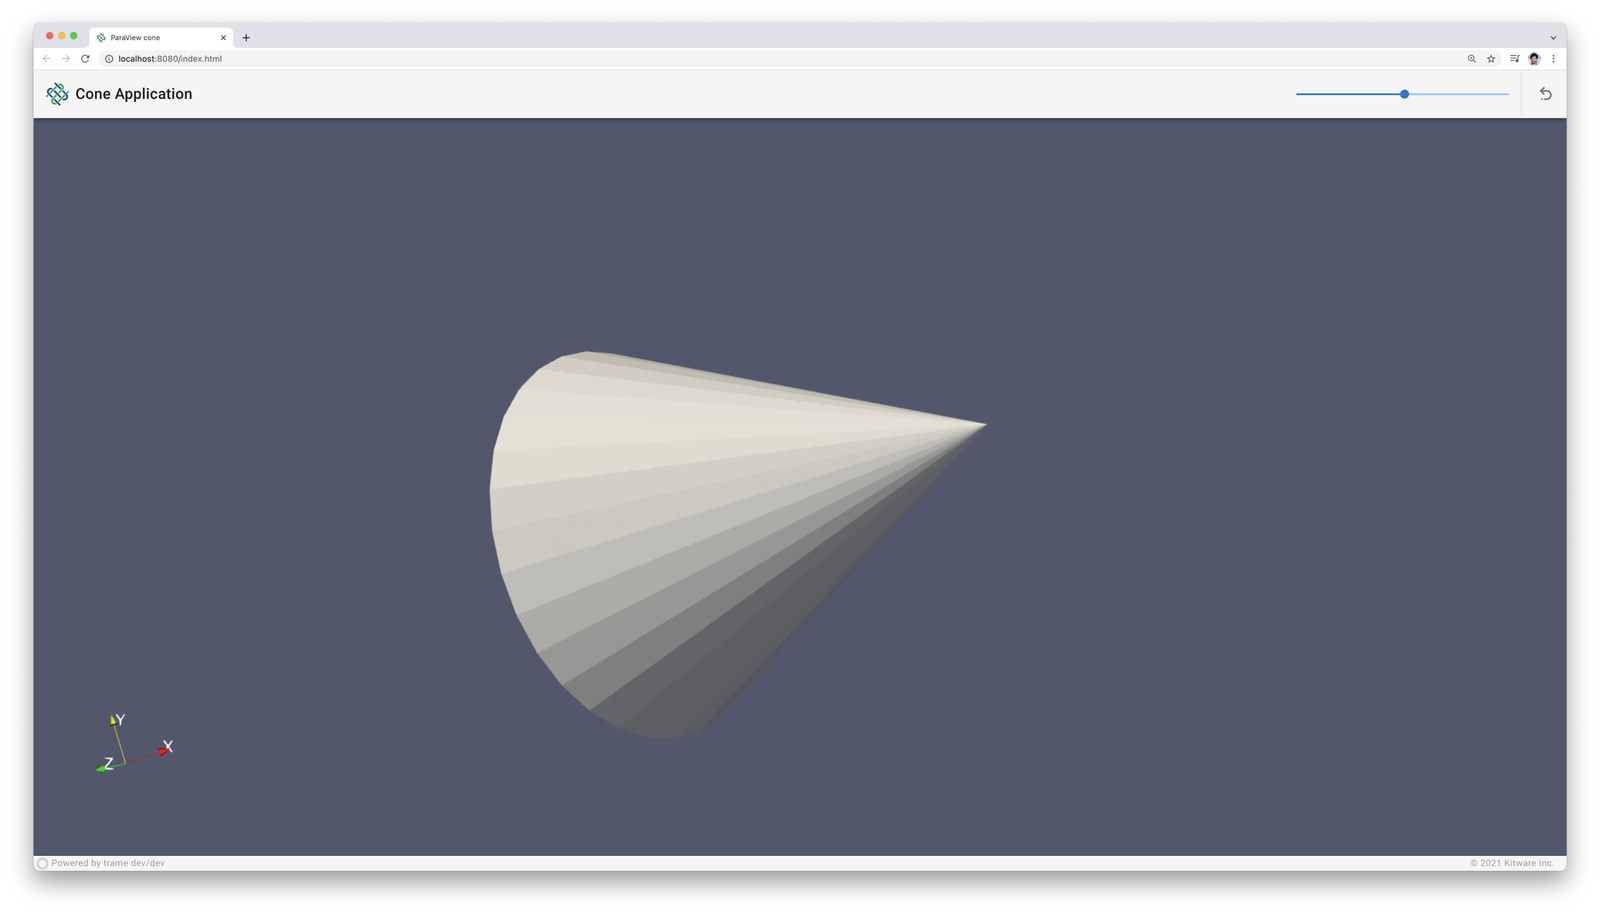
Understanding this ParaView example
ParaView use proxies which abstracts the VTK object handling so they can be easily distributed to support the processing of very large datasets.
For simplified usage, ParaView provides a simple package that lets us simply create and interact with these proxies. The SimpleCone.py example provides the core concepts needed to understand how to work with ParaView.
from paraview import simple

# [...]

class ConeApp(TrameApp):
    # [...]

    def _init_paraview(self):
        self.cone = simple.Cone()               # Create a source (reader, filter...)
        self.representation = simple.Show(cone) # Create a representation in a view (if no view, one is created)
        self.view = simple.Render()             # Ask to compute image of active view and return the corresponding view
With these three lines, we create a full pipeline and a view. Now, we can use trame to show that view in the client.
from trame.app import TrameApp
from trame.ui.vuetify3 import SinglePageLayout
from trame.widgets import vuetify3 as v3
from trame.decorators import change


DEFAULT_RESOLUTION = 6

# [...]

class ConeApp(TrameApp):

    def __init__(self, server=None):
        super().__init__(server)

        self._init_paraview()
        self._build_ui()

    def _init_paraview(self):
        # [...]

    # [...]

    def _build_ui(self):
        self.state.trame__title = "ParaView cone"

        with SinglePageLayout(self.server) as self.ui:
            # [...]
            with self.ui.content:
                with v3.VContainer(
                    fluid=True,
                    classes="pa-0 fill-height",
                ):
                    html_view = paraview.VtkRemoteView(self.view)
                    # html_view = paraview.VtkLocalView(view)
                    self.ctrl.view_update = html_view.update
                    self.ctrl.view_reset_camera = html_view.reset_camera
The rest of the code looks very similar to the VTK Hello trame example, but instead of importing the vtk module of trame
from trame.widgets import vuetify3 as v3, vtkwe import the paraview module
from trame.widgets import vuetify3 as v3, paraviewGUI
Now we can start adding some UI to control some of the parameters that we want to interact with dynamically. Let's first add a slider to control the resolution of the cone. We need to create a method to react when the resolution is changed by the slider. In ParaView proxies, object parameters are simple properties that can be get or set in a transparent manner. At this point, we simply need to update the cone.Resolution and update the view to see the change.
class ConeApp(TrameApp):

    # [...]

    @change("resolution")
    def update_cone(self, resolution, **_):
        self.cone.Resolution = resolution
        self.ctrl.view_update()

    def update_reset_resolution(self):
        self.state.resolution = DEFAULT_RESOLUTION
Now, we can extend the UI with a slider on the layout.toolbar
class ConeApp(TrameApp):

    # [...]

    def _build_ui(self):
        self.state.trame__title = "ParaView cone"

        with SinglePageLayout(self.server) as self.ui:
            self.ui.icon.click = self.ctrl.view_reset_camera
            self.ui.title.set_text("Cone Application")

            with self.ui.toolbar:
                v3.VSpacer()
                v3.VSlider(
                    v_model=("resolution", DEFAULT_RESOLUTION),
                    min=3,
                    max=60,
                    step=1,
                    hide_details=True,
                    density="compact",
                    style="max-width: 300px",
                )
                v3.VDivider(vertical=True, classes="mx-2")
                v3.VBtn(icon="mdi-undo-variant", click=self.update_reset_resolution)

            with self.ui.content:
                # [...]
With these few lines, we have created a 3D cone, which we can adjust the resolution all leveraging ParaView.
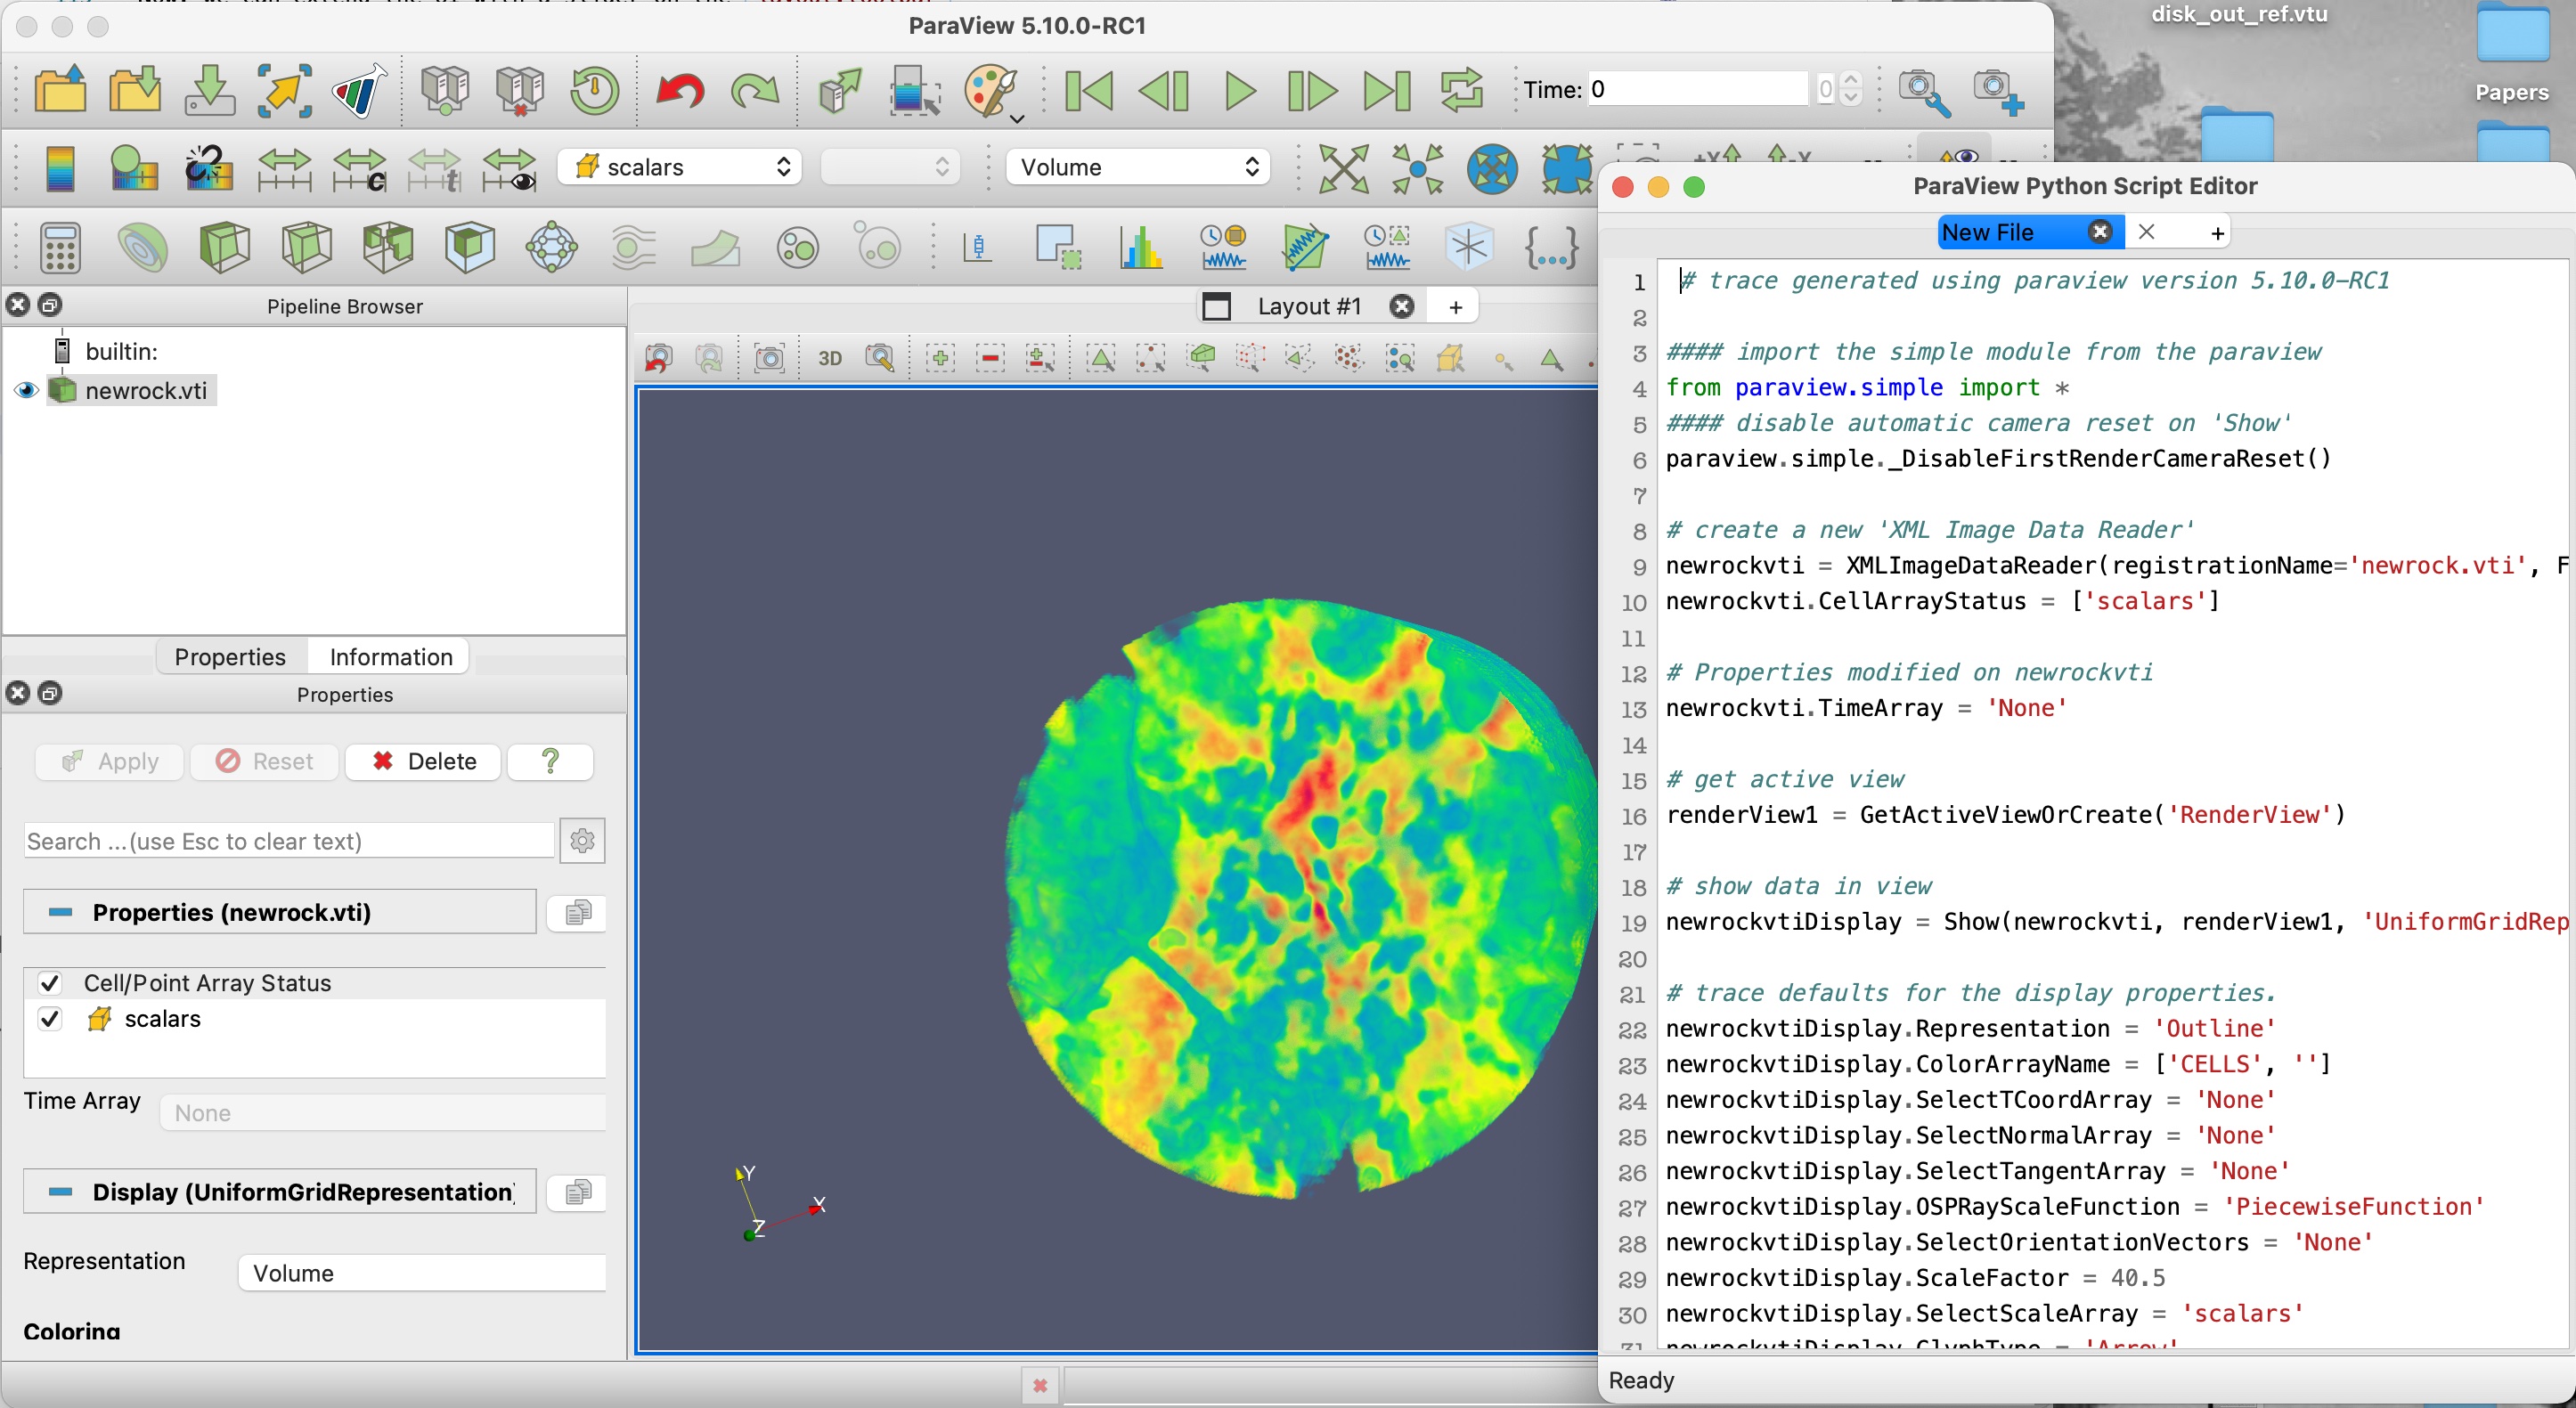
To learn more about ParaView scripting, look into ParaView trace which let you convert your UI interaction into actual Python code that can then be reused in your application.
Advanced example
With the basics in place, we can now dive further in by using some built-in features of ParaView, such as saving and loading a state file. State files are a convenient way of capturing all the settings that were used to generate a visualization with Paraview.
Let's analyse the example in ./05_paraview/StateLoader.py. The trame core of the example is as follows
Script Header
from trame.app import TrameApp
from trame.ui.vuetify3 import SinglePageLayout
from trame.widgets import vuetify3 as v3
from trame.widgets import paraview, client

from pathlib import Path

from paraview import simple
Script Core
The rest of the script we've seen before, but we are missing the details of the load_data function.
class StateLoaderApp(TrameApp):
    # [...]
    def load_data(self):
        pass # I'll explain later

    def _build_ui(self):
        self.state.trame__title = "State Viewer"

        with SinglePageLayout(self.server) as self.ui:
            self.ui.icon.click = self.ctrl.view_reset_camera
            self.ui.title.set_text("ParaView State Viewer")

            with self.ui.content:
                with v3.VContainer(fluid=True, classes="pa-0 fill-height"):
                    client.Loading("Loading state")


def main():
    app = StateLoaderApp()
    app.server.start()

if __name__ == "__main__":
    main()
load_data
The load_data() function requires us to code the follow
- Process a
--dataargument that contains the path to the file to load - Load the provided file path as a state file.
- Create a view element and connect it to the view defined in the state
- Add that view element into the content of our UI
Process CLI argument --data
The (1) is achieved with the following set of lines. More information on CLI arguments are available here.
class StateLoaderApp(TrameApp):

    def __init__(self, server=None):
        super().__init__(server)
        self.server.cli.add_argument("--data", help="Path to state file", dest="data")
        # [...]
        self.ctrl.on_server_ready.add(self.load_data)
        # [...]


    def load_data(self, **_):
        args, _ = self.server.cli.parse_known_args()

        full_path = str(Path(args.data).resolve().absolute())
        working_directory = str(Path(args.data).parent.resolve().absolute())
        # [...]

    # [...]
Load the state file
To achieve (2) with ParaView the following set of lines are needed. ParaView trace should be able to explain the magic using the UI and looking at the corresponding Python code.
class StateLoaderApp(TrameApp):

    # [...]

    def load_data(self, **_):

        # [...]

        simple.LoadState(
            full_path,
            data_directory=working_directory,
            restrict_to_data_directory=True,
        )
        self.view = simple.GetActiveView()
        self.view.MakeRenderWindowInteractor(True)
        simple.Render(self.view)
Create and Connect a view element
Then (3) is similarly as before for VTK.
class StateLoaderApp(TrameApp):

    # [...]

    def load_data(self, **_):

        # [...]

        with SinglePageLayout(self.server) as self.ui:

            # [...]

            with self.ui.content:
                with v3.VContainer(fluid=True, classes="pa-0 fill-height"):
                    html_view = paraview.VtkRemoteView(self.view)
                    self.ctrl.view_reset_camera = html_view.reset_camera
                    self.ctrl.view_update = html_view.update
Add view element to UI
Finally (4) is achieved with the following set of lines, the same way it was achieved with VTK in trame when switching from remote to local rendering.
class StateLoaderApp(TrameApp):
   def __init__(self, server=None):
        # [...]

        self._build_ui()

    # [...]

    def _build_ui(self):
        self.state.trame__title = "State Viewer"

        with SinglePageLayout(self.server) as self.ui:
            self.ui.icon.click = self.ctrl.view_reset_camera
            self.ui.title.set_text("ParaView State Viewer")

            with self.ui.content:
                with v3.VContainer(fluid=True, classes="pa-0 fill-height"):
                    client.Loading("Loading state")
That's it. You now have a ParaView trame application that let you reproduce complex visualization in a web context.
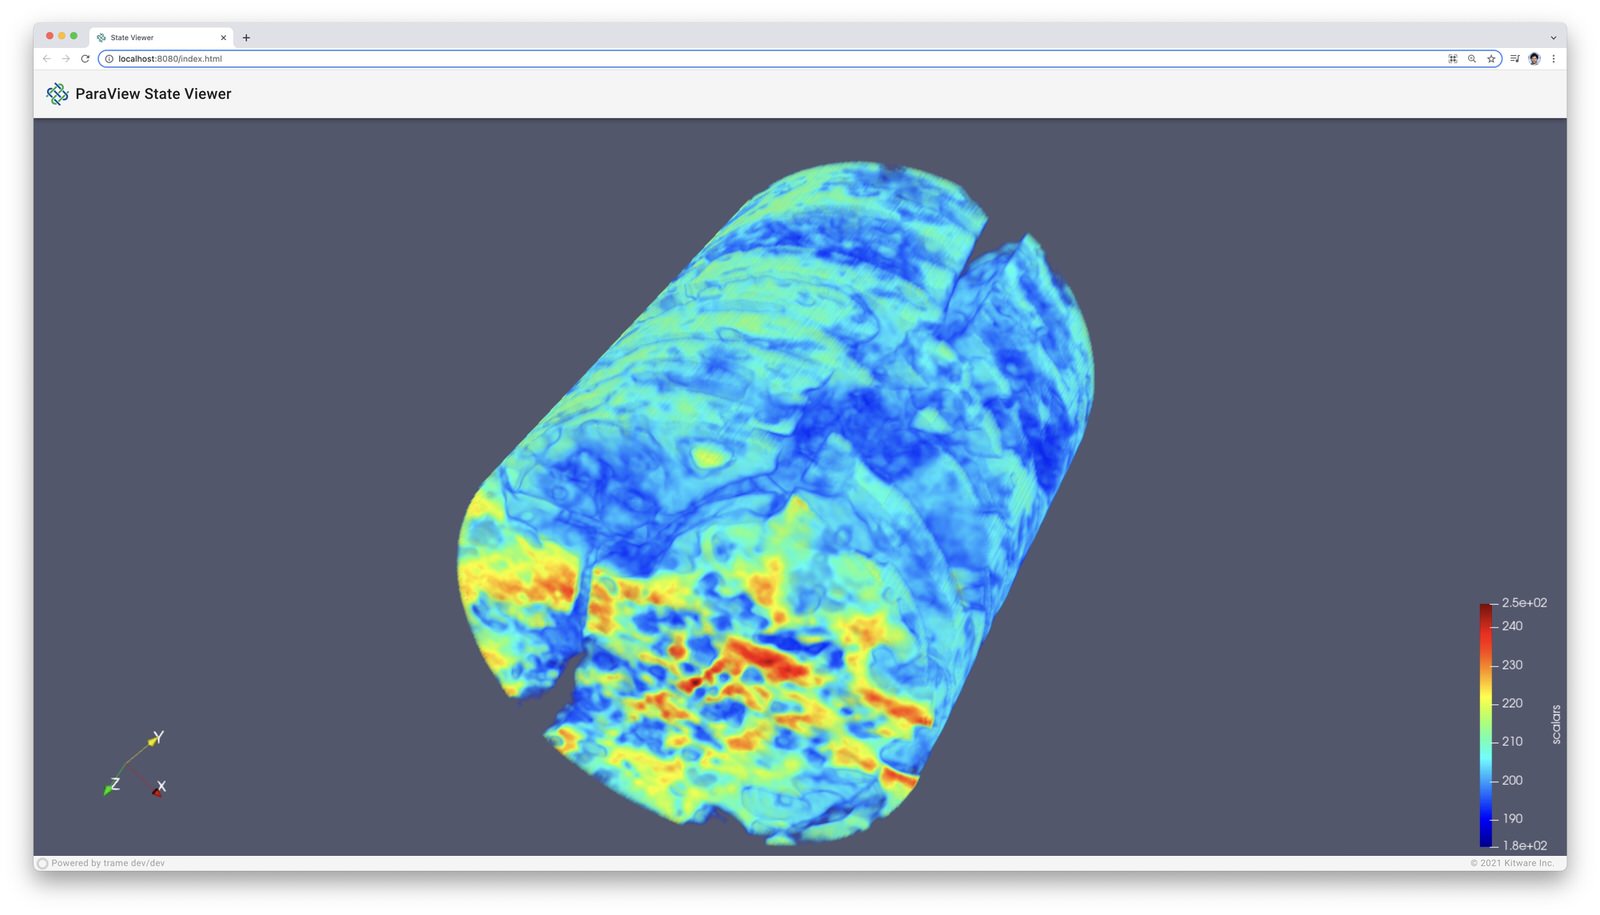
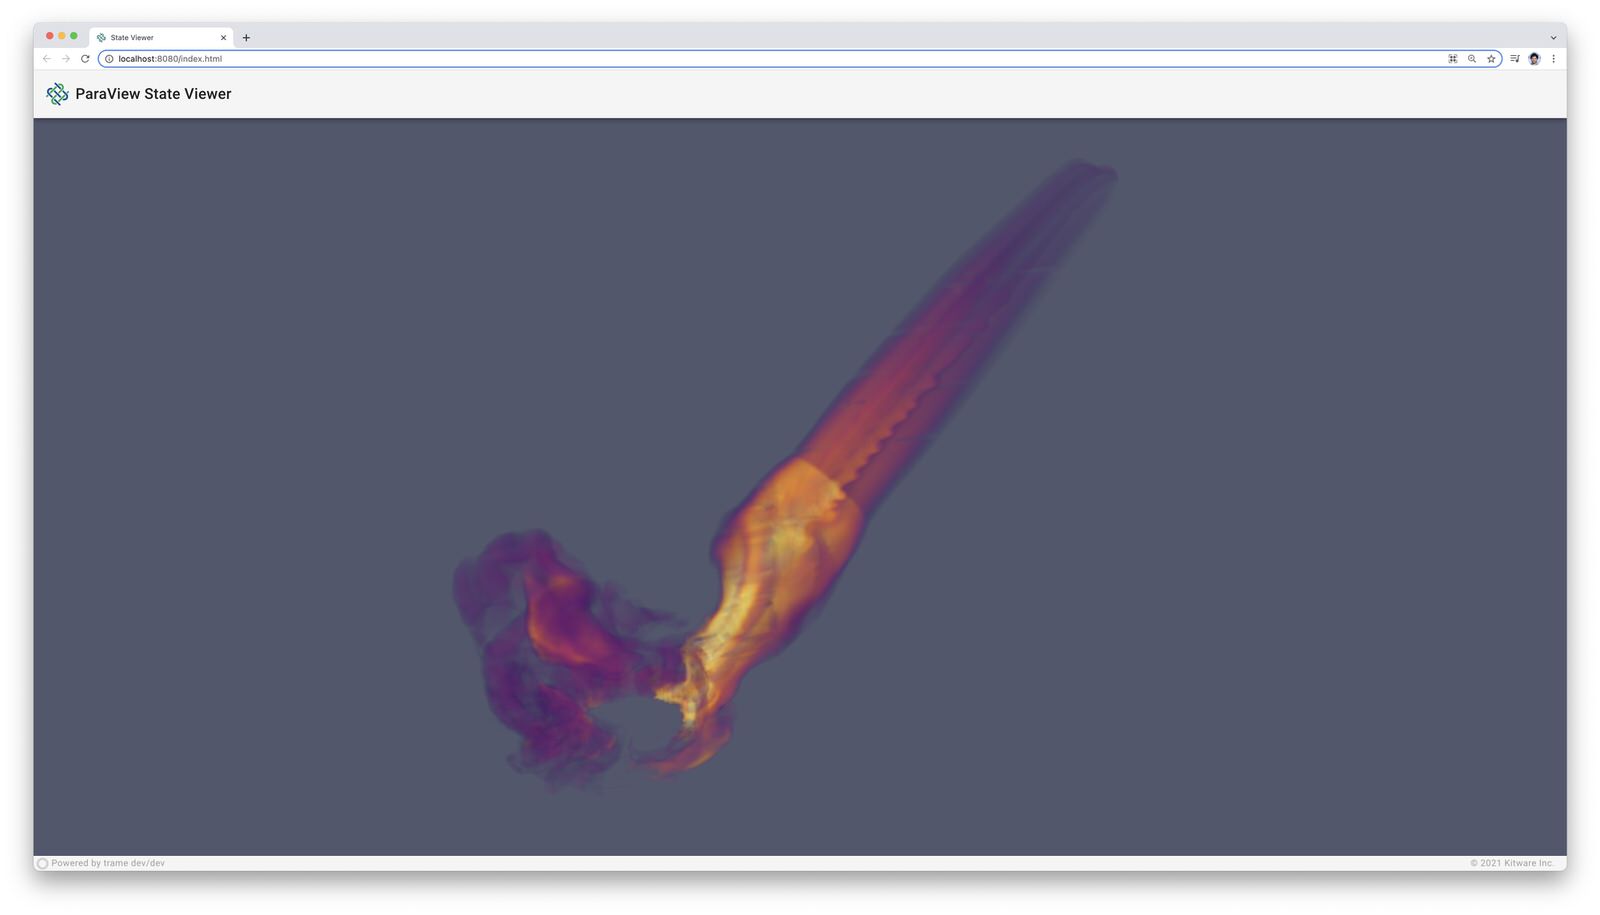 | 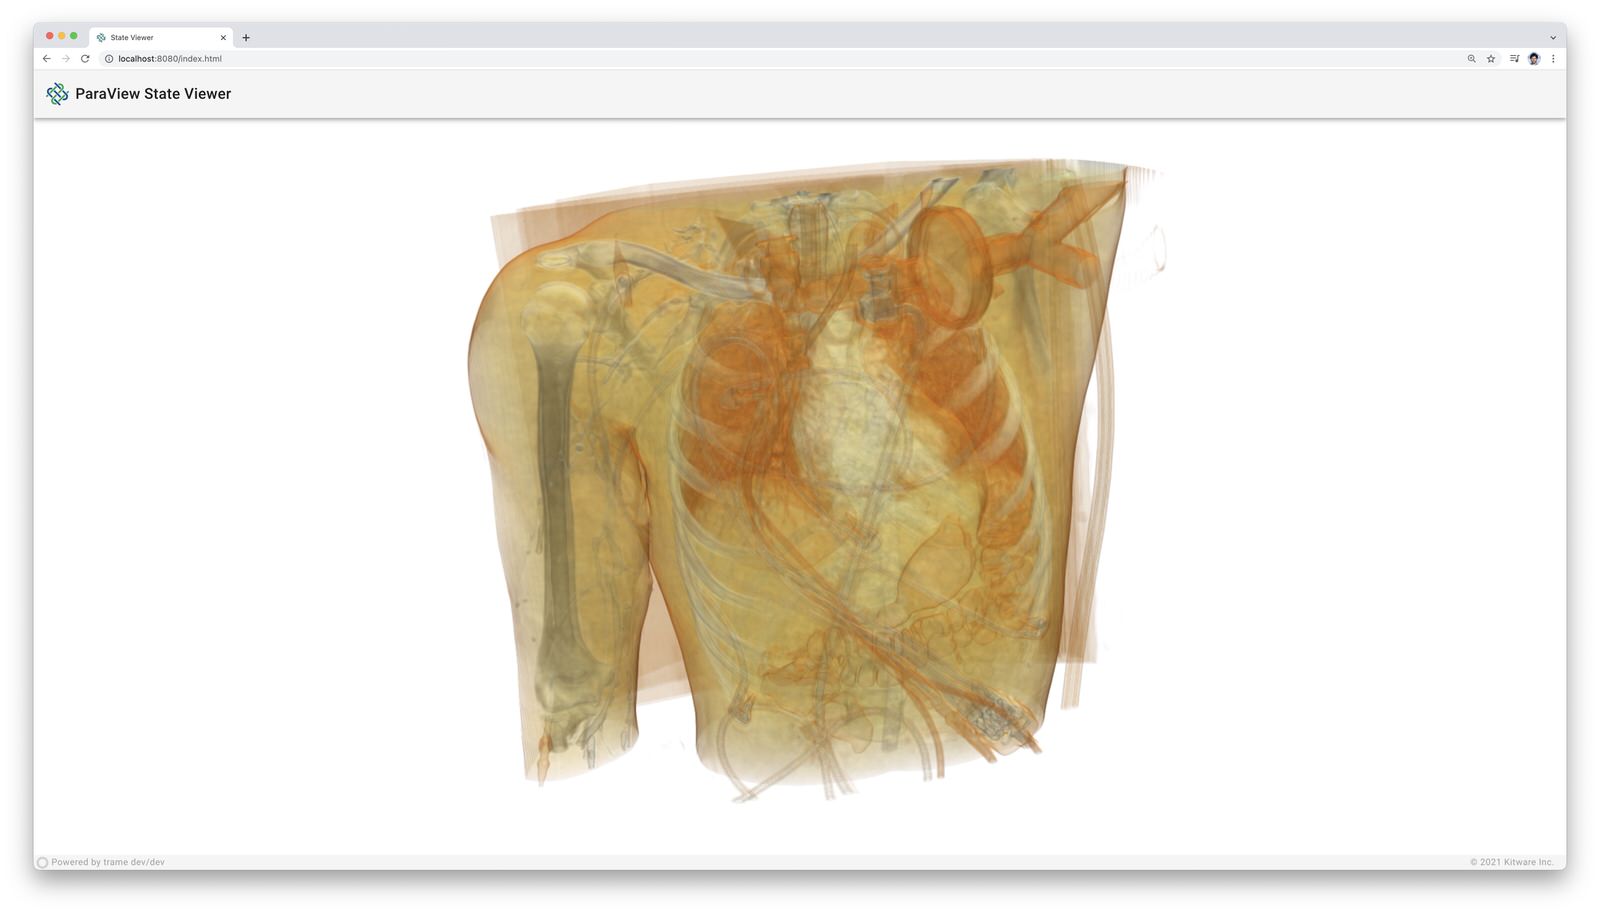 |
|---|---|
| Asteroid state | Volume rendering state |
Running the StateLoader
/Applications/ParaView-6.1.0.app/Contents/bin/pvpython \
    --venv .pvenv \
    ./05_paraview/StateLoader.py  \
    --data ./data/pv-state-diskout.pvsm
# or
/Applications/ParaView-6.1.0.app/Contents/bin/pvpython \
    --venv .pvenv \
    ./05_paraview/StateLoader.py  \
    --data ./data/pv-state.pvsm
Your browser should open automatically to http://localhost:8080/
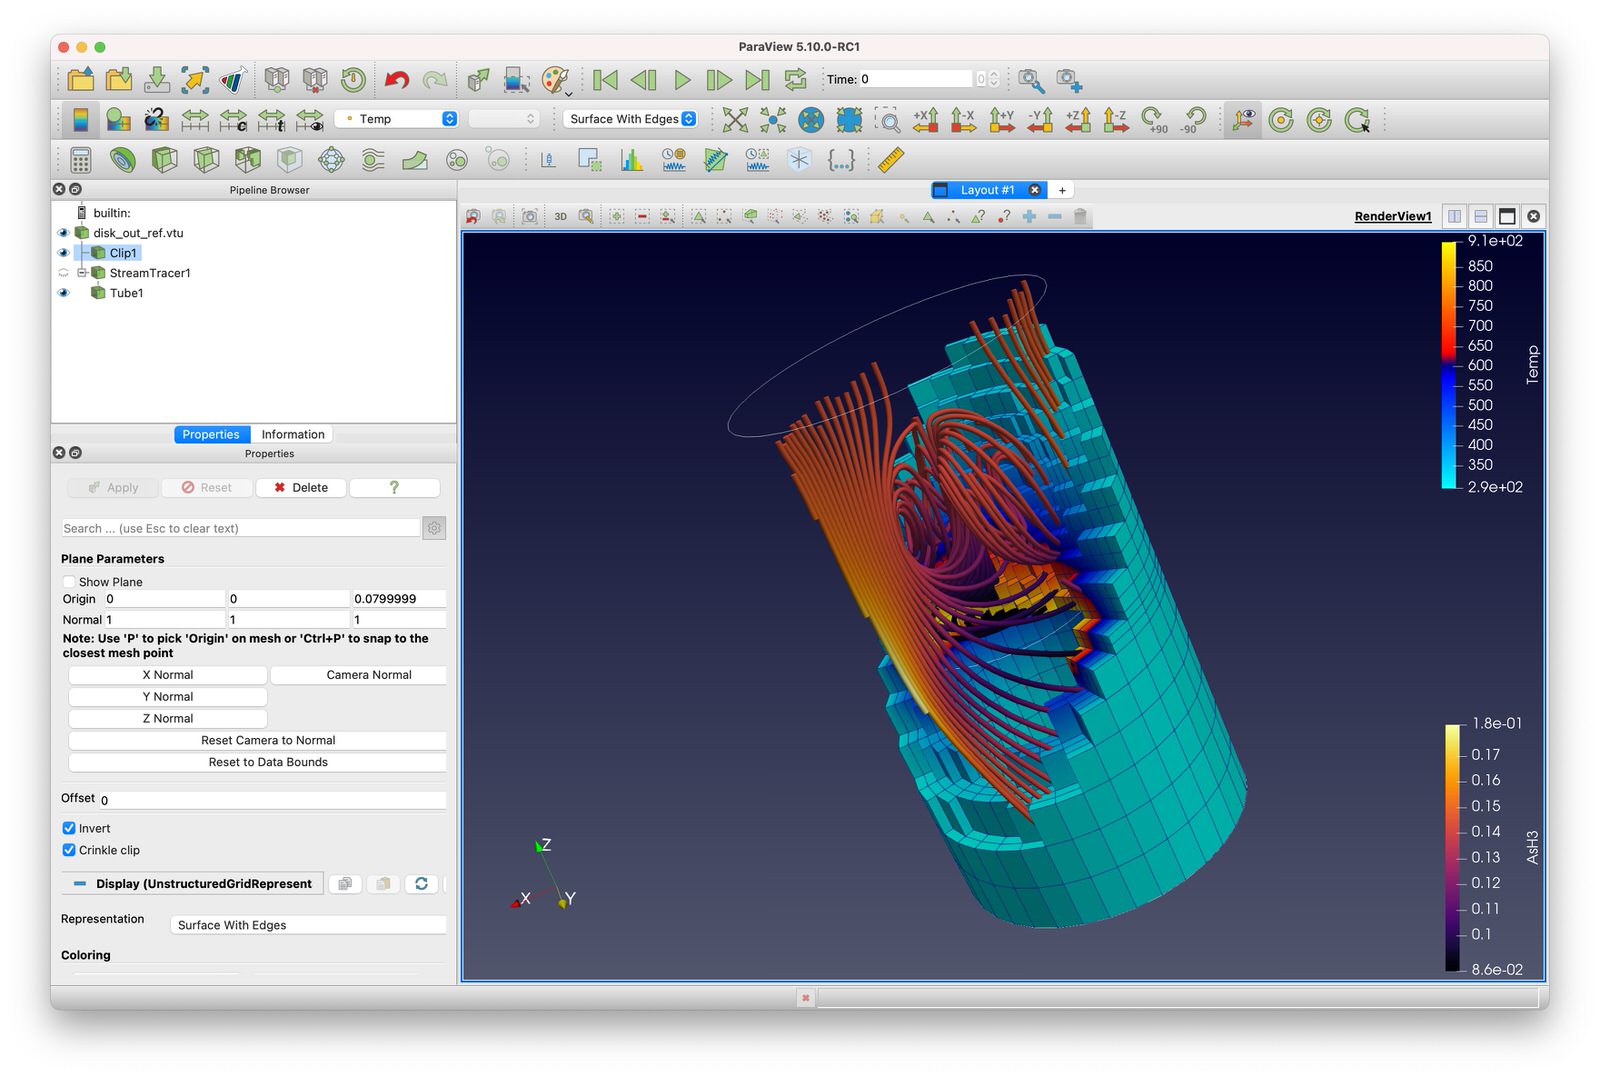 |  |
|---|---|
| ParaView | Trame viewer |